Saturday, October 27, 2012

Puffy Apple Oven Pancake

I discovered the original puffy oven pancake this summer while staying with my parents, and while it was very tasty I felt as if something was missing. That something was apples, brown sugar, and cinnamon. With the addition of those three ingredients this is really the perfect breakfast. Plus it's already sweet enough that you don't even need to use any maple syrup.

Puffy Apple Oven Pancake
Adapted from Betty Crocker "Heart Health Edition Cookbook" 
1 pancake (2 servings)

Ingredients:
2 tbsp unsalted butter
1 medium apple
2 tbsp packed light brown sugar
1/4 tsp ground cinnamon
2 eggs
1/2 cup milk
1/4 tsp salt
1/2 cup all-purpose flour

1. Preheat oven to 400F degrees.

2. Peel, core, and thinly slice one apple.

3. In a 9-inch pie plate, melt butter in oven. Once melted remove from oven and brush butter over bottom and side of plate.

4. Sprinkle the brown sugar and cinnamon over the butter in the pie plate. Arrange apples over sugar.

5. In a medium bowl, beat eggs slightly with a wire whisk. Beat in milk and salt. Gently beat in flour until just mixed. Do not over mix or the pancake may not puff! Pour pancake batter into pie plate.

6. The original recipe says to bake 25-30 minutes without apples and 30-35 minutes with apples. Mine was done around 20 minutes, so keep an eye on it as it bakes. The pancake is done once it is puffy and a deep golden brown along the edges.

7. Once done, immediately loosen edge of pancake and turn upside down onto heatproof serving plate.

8. Enjoy!


Nutritional Info per Serving:
Calories 361; Total Fat 17g; Cholesterol 248mg; Sodium 394mg; Total Carbs 42g; Protein 11g

Wednesday, October 24, 2012

Apple Cookies

Fall is my favorite season, and one of my favorite foods this time of year is fresh apples. A couple of weeks ago I bought roughly 8lbs of fresh picked apples from my local grocery store, it seemed like a good idea at the time...Roughly two weeks later, I'm now scrambling for ways to use up the apples before they go bad (though I have kept them in the fridge to extend their shelf-life). After snacking on apples almost everyday, and making a failed honey apple challah bread (more on my love of challah later), I discovered a recipe for apple cookies while browsing the internet. Below is a modified version of the recipe I found.

Apple Cookies
Adapted from Bakers & Best
Serving size vary - I got 17 large cookies out of this batch

Ingredients:
1/2 cup unsalted butter (8 tbsp), softened
1 cup packed light brown sugar (according to the original recipe regular sugar is alright too, but I feel that the brown sugar really adds to the flavoring)
1/2 tsp vanilla extract
1/2 tsp nutmeg
1/2 tsp baking soda
1/2 tsp salt
3/4 tsp baking powder
1 tsp cinnamon
1 1/2 cups all-purpose flour
1 large apple or 2 small apples (I used Macintosh, though a tarter apple might hold up better over time)

1. Preheat oven to 350F degrees. Line a medium baking sheet with parchment paper.

2. Peel, core, and cut apple(s) into small pieces. Place onto parchment lined baking sheet and bake for 15-20 minutes.

3. While the apples are baking, prepare the cookie batter. With a hand mixer or whisk, combine butter and sugar until well combined. Next whisk in the egg and vanilla extract. Mix in the baking soda, baking powder, salt, nutmeg, and cinnamon. Slowly mix in the flour until well combined.

4. By this point the apples should be almost done. Once they are out of the oven, let them cool for 5-10 minutes.

5. Once cooled, gently use a rubber spatula to fold the apples into the batter.

6. Using a large ice cream scoop, scoop out onto parchment lined baking sheets and bake for 10-12 minutes.

7. Cookies are done when the edges start to turn a golden-brown.

8. Cool on the baking sheet for about 10 minutes before transferring to a cooling rack.

9. Enjoy!


Additional Note: Eat these cookies right away! The apples break down quickly once baked and these cookies will get mushy very fast, especially if kept in containers such as plastic bags (I learned this the hard way the first time I made them!). 

Nutritional Info per Cookie:
Calories 138; Total Fat 6g; Cholesterol 27mg; Sodium 136mg; Total Carbs 21g; Protein 2g

Peanut Butter Cookies

These were the second batch of cookies I made for the book and bake sale, and they were a huge success! If you love peanut butter, then these are the cookies for you.

Peanut Butter Cookies
Adapted from Smitten Kitchen
Serving size vary - I got 48 small cookies out of this batch

Ingredients:
1/2 cup unsalted butter (8 tbsp), softened
1 cup peanut butter at room temperature
3/4 cup sugar, plus 1-3 tbsp for sprinkling
1/2 cup packed light brown sugar
1 egg at room temperature
1 tbsp milk
1 tsp vanilla extract
3/4 tsp baking soda
1/2 tsp baking powder
1/4 tsp salt
1 1/4 cup all-purpose flour

1. Preheat oven to 350F degrees.

2. In a large bowl, whisk together the butter and peanut butter until smooth. Add the sugars and whisk until smooth again. Whisk in the egg, milk, and vanilla extract. Whisk in the baking soda, baking powder, and salt. Slowly mix in the flour.

3. Place the sprinkling sugar, 1 tbsp at a time as needed, on a plate (or in my case, salad bowl).

4. Once all of the ingredients are combined, use an ice cream scoop (I used a small one) to form the cookies, scooping them into your hand and gently round into a ball (don't worry too much about the shape at this point).

5. Place the now rounded dough onto the plate with the sugar, gently rolling around to cover all sides.

6. Once covered in a fine layer of sugar, transfer to an ungreased cookie sheet. Use a fork to gently create a criss-cross pattern, making sure not to overly flatten the cookies.

7. Bake for 5-7 if making small cookies, 10-12 for larger ones. Do not overbake! These cookies are hard to judge when done, and may appear undercooked when first removed, but they are not. Let cool for roughly a minute before transferring to a cooling rack.

8. Enjoy!


Nutritional Info per Cookie:
Calories 82; Total Fat 5g; Cholesterol 10mg; Sodium 65mg; Total Carbs 9g; Protein 2g

Tuesday, October 23, 2012

Oatmeal Chocolate Chip Cookies

This week my department is holding a fundraising book and bake sale to support our spring conference, and since I can't bear to part with any of my books, I made dozens of cookies instead!

Oatmeal Chocolate Chip Cookies
Adapted from Smitten Kitchen
Servings size vary - I got 41 small cookies out of this batch

Ingredients:
1 egg
1/2 cup unsalted butter (8 tbsp), softened
2/3 cup packed light brown sugar
1/2 tsp vanilla extract
3/4 cup all-purpose flour
1/2 tsp baking soda
1/2 tsp ground cinnamon
1/4 tsp salt
1 1/2 cups rolled oats
1 cup semi-sweet mini chocolate chips (3/4 cup if you want slightly less chocolaty cookies)

1. Preheat oven to 350F degrees.

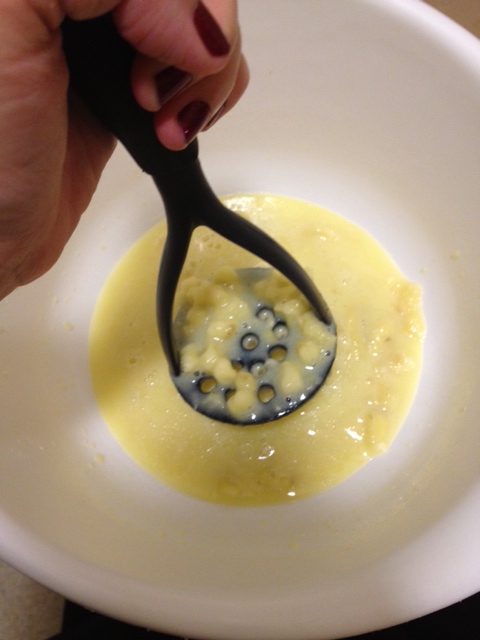
2. In a large bowl, cream together the egg, butter, brown sugar, and vanilla. Unless your butter is pretty soft (or you want a great upper body workout), I recommend using an electric beater for this step.

3. Whisk in baking soda, cinnamon, salt, and flour. The original recipe says to combine these in a separate bowl, but I find that it's just as easy to add them to the butter/sugar mix from the start, especially if you have a small kitchen and a limited number of mixing bowls.

4. Stir in the oats and chocolate chips.

5. Cover the bowl with plastic wrap and chill in the fridge. This step helps to produce a thicker cookie, but if you're in a rush you can skip it and continue baking. Let chill anywhere from 30 min to a few hours (I let mine chill while I went to class).

6. Line a large baking sheet with parchment paper and pick your cookie scoop. I find ice cream scoops to work really well in forming consistently sized cookies. I own two sized scoops, the one on the left makes smaller, roughly 2 inch cookies, while the one on the right makes nice large cookies, roughly 3 inches.

7. Scoop cookies roughly 2 inches apart onto the parchment lined baking sheet. After I fill the sheet, I normally return the remaining mix to the fridge to chill before preparing the next batch.

8. Bake for 10-12 minutes for larger cookies, or if doing smaller ones as I did, 5-8 minutes. Remove cookies when the edges are golden but still look undercooked on top.

9. Let the cookies stay on the hot baking sheet for roughly 5 minutes before transferring to a cooling rack.

10. Enjoy!


Nutritional Info per Cookie:
Calories 79; Total Fat 4g; Cholesterol 11mg; Sodium 32mg; Total Carbs 10g; Protein 1g

Monday, October 22, 2012

Banana Muffins

My favorite banana is a ripe banana. They're perfect for making muffins, cakes, and breads, amongst many other tasty treats. Plus, what's great about this recipe is that it doesn't have an overwhelming banana flavor, it's much more subtle, which I appreciate since I didn't always enjoy this fruit.

Banana Muffins
Adapted from Betty Crocker "Heart Health Edition Cookbook"
12 Servings (1 muffin each)

Ingredients:
1 egg
1/4 cup vegetable oil
1/3 cup milk
1 cup mashed bananas (roughly 2 medium bananas)
2 cups all-purpose flour
1/2 cup packed brown sugar
2 tsp baking powder
1/2 tsp salt

1. Preheat oven to 400F degrees. Grease with shortening, spray with cooking oil, or line with paper baking cups 12 medium muffin cups.

2. In a large bowl, beat egg, oil, and milk until well mixed. As a side note, I usually try to add the egg first in recipes so that if there's any problems with the egg it doesn't ruin the entire recipe.

3. Mash in the bananas. For this step I highly recommend using a potato masher, as a whisk does not work well at all...


4. Stir in sugar, baking powder, and salt, making sure that any big sugar clumps are broken down. Next, add the flour, stirring only until it is moistened. This step is critical! Over mixing the flour will cause the muffins to become tough and heavy.

5. Divide batter evenly among muffin cups. I find that this is best done with an ice cream scoop (which I bought specifically for baking!).

6. According to the original recipe these should bake for 20-25 min, or until golden brown, but mine were done in roughly 10-15 min since my oven runs very hot (yes, I tried to compensate, but still nothing works to fix this problem, so frustrating!!).

7. Once done, transfer to wire rack for cooling down. This should be done immediately if using paper baking cups, or about 5 minutes after being removed if not using paper baking cups.

8. Enjoy!

~ These muffins can also be frozen for a longer shelf life and quickly reheated as needed in the microwave.

preparing for the freezer 

Nutritional Info per Serving:
Calories 160; Total Fat 5g; Cholesterol 18mg; Sodium 194mg; Total Carbs 27g; Protein 3g

Sunday, October 21, 2012

Homemade Pepperoni Pizza

As my previous two posts might indicate, this weekend was dedicated to making homemade pizza!

Homemade Pepperoni Pizza
1 pie (roughly 4 servings)

Ingredients:
1 24-hour pizza dough
1/2 cup pizza sauce
8 oz mozzarella cheese (I highly recommend splurging for the fresh cheese)
pepperoni slices (I used roughly 28 pieces)
2 tbsp grated parmesan cheese

1. Preheat oven to 350F degrees.

2. Slowly work dough to fit 12in pizza pan. Grate mozzarella and parmesan cheese, if not pre-grated.

3. Slowly pour and spread 1/2 cup pizza sauce over the dough. If you like a saucier pizza feel free to add more sauce. With your hands spread roughly 3/4 of the mozzarella cheese over the sauce. Next add the pepperoni slices (or any other toppings you desire). Finish off by adding the remaining mozzarella cheese and the parmesan cheese.

4. Bake for roughly 10-20 minutes, though keep an eye on it the entire time. Mine was originally supposed to be done in 7 min, but took roughly 15, though another 1-3 probably wouldn't have hurt it either.

5. Enjoy!


Nutritional Info per Serving (toppings only):
Calories 227; Total Fat 20g; Cholesterol 62mg; Sodium 671mg; Total Carbs 0g; Protein 18g

Pizza Sauce

This sauce is perfect for pizza, and also for many other Italian favorites, including lasagna.

Pizza Sauce
Adapted from Smitten Kitchen 
2 1/2 cups (roughly 10 servings)

Ingredients:
1 28oz can of San Marzano tomatoes
5 tbsp unsalted butter
1 medium onion, peeled and halved
1 bay leaf
1/2 tsp garlic powder, or to taste
1/2 tsp leaf oregano, or to taste

1. Combine tomatoes, butter, onion, and bay leaf in a heavy sauce pan or deep frying pan over medium heat.

2. Bring sauce to a heavy simmer, then lower heat and slowly simmer the sauce for roughly 45 min. Stir occasionally, crushing the tomatoes against the side of the pot with a wooden spoon.

3. About half-way through add the garlic powder and leaf oregano, along with any other Italian seasonings you may desire.

4. Optional step - if you want a smoother sauce, as I did, slowly place small amounts of the sauce into a food processor to puree.

6. Enjoy!

Nutritional Info per Serving (each serving roughly 1/4 cup):
Calories 73; Total Fat 6g; Cholesterol 15mg; Sodium 92mg; Total Carbs 3g; Protein 1g

24-Hour Pizza Dough

I enjoy weekend-long cooking projects, so this dough is perfect. Plus, it's probably one of the simplest recipes I've ever seen!

24-Hour Pizza Dough
Adapted from "The Doughmakers Cookbook" 
1 pie (roughly 4 servings)

Ingredients:
2 cups all-purpose flour, plus extra for kneading
1 1/8 tsp rapid rise yeast (roughly half a package of 1/4 oz yeast)
3/4 tsp salt (the original recipe called for kosher salt, but I used regular table salt since I only had that available)
3/4 cup very warm water
1 tbsp olive oil, plus 1 tsp

1. In a medium bowl mix flour, yeast, and salt until well blended.

2. Slowly mix in the water. Next mix in 1 tbsp olive oil. At this point you may want to do the mixing by hand, as a nice dough should be forming.

3. Remove dough from bowl and knead on a lightly floured surface for roughly 5 minutes, or until the dough is pliable and only slightly sticky.

4. Put 1 tsp of olive oil in a gallon-sized zippered plastic bag. Close bag and press on the outside to work the oil around the entire bag. Open the bag and add the dough. Let rest overnight in the fridge until ready to use the next day (dough will rise slightly during this process).

5. When ready to use the dough the next day, remove from the fridge roughly 20-30 min before you want to start cooking, so that it has time to come to room temperature and is more workable.

6. Enjoy!

Nutritional Info per Serving (roughly 2 slices per serving in an 8 slice pie):
Calories 237; Total Fat 3g; Cholesterol 0mg; Sodium 444mg; Total Carbs 44g; Protein 6g

Chocolate Pancakes

Greetings All!

Well, after saying for the past two years that I would start a cooking/baking blog, I finally have! The goal of this blog is to share some of my favorite recipes with the world. As a long-term grad student, I find spending time in the kitchen to be a great source of stress relief - there's really nothing better than taking out one's frustration while kneading dough! So, let the eating begin!

Chocolate Pancakes
Adapted from Betty Crocker "Best Bisquick Recipes"
2 Servings (3 pancakes each)

Ingredients:
1/2 egg
1/8 cup chocolate flavored syrup
5/8 cup milk (roughly 5oz)
1 cup Bisquick Mix (I used the Heart Smart mix)
1 medium banana, if desired


1. In a medium bowl whisk together the egg, chocolate syrup, and milk until combined.


2. Gently whisk the Bisquick mix into the liquid ingredients until blended. Like other pancakes you don't want to over mix the batter.

3. Brush or spray griddle or skillet (or frying pan in my case!) with vegetable oil. This should be done between each pancake as well to achieve consistent cooking for each one. Heat cooking surface over medium heat.

4. For each pancake, pour slightly less than 1/4 cup batter onto the heated cooking surface. I wound up pouring a little more than a 1/4 cup for each of my pancakes, so the last one came out a bit smaller than the rest. Cook until edges are dry. Flip. Cook until other side is golden brown. Do not flip the pancake more than once, or they will became too tough!


5. Serve with bananas, or any other topping you desire (strawberries, whipped cream, nuts, etc), and maple or chocolate syrup. I didn't want too chocolatey a flavor, so I used maple syrup, but the original recipe does call for chocolate flavored syrup.

6. Enjoy!


Nutritional Info per Serving (not including bananas and maple syrup):
Calories 269; Total Fat 6g; Cholesterol 57mg; Sodium 592mg; Total Carbs 45g; Protein 9g